In these days, I wanted to experiment and deepen my knowledge in the field of chatbot, I made this choice because at this moment, this technology is widely used and really growing.
A little theory #
Chatbots have been around for a long time, really for a long time, they date back to the early 60s70s with ELIZA and PARRY. These two projects were born for the purpose of creating a simulated conversation with a machine. In many cases, these two chatbots have managed to deceive the people involved, but using very vague but intelligent answers.
These two projects, however, despite being classified as chatbots, were very stupid, they do not have the same conception of today’s chatbot. The software behind the old chatbots was very simple, we can see it as a one-to-one mapping (question -> answer). There was no interpretation of the question. Most modern Chatbots, on the other hand, use natural language that we can imagine with the composition of three main elements:
-
lexical analysis (decomposition of sentence into token)
-
grammatical analysis (association of parts of speech)
-
syntactic analysis (token arrangement in a tree structure)
-
analysis semantics (assigning a meaning)
Thus described it seems simple and we as humans are able to do it without knowing the existence of all these steps. Teaching a machine how to process the steps listed above is really difficult. Especially the last point of the semantic analysis.
Nowadays the most common Chatbots that we use without realizing it are Ok Google, Alexa, Siri, Cortona and every day there are more and more new ones. The growing areas where they are most used are banks, customer service and e-commerce.
But why are chatbots called by personal names? #
I have not found this answer online but I believe the answer is simple. As we have to interact with something with human features, what could be the best way to do it, if not to give a name with which we can call it? Almost all interactions with other people begin with the person’s first name, it is needed to request his/her attention.
What’s behind the hood? #
But what’s behind these Chatbots? In the case of Ok Google, the service in the background is just DialogFlow, This service made available to everyone, allows everyone in an agile way to create a real chatbot in a few steps and without any programming knowledge, the concept is very easy, it is basically based on the creation of intents and answers.
I will explain in this article how to use DialogFlow and how to implement it using Flutter. Why Flutter? Because I think it is really growing at the moment. The project is growing so much that it is compatible with many platforms. In particular, it works natively on Android and IOS and works really well, according to the tests made, it has performances almost equal to the native languages (Java / Swift / c ++). Although still in Beta, the Web function is going great, and it also works for desktop environments (linux and Windows). What is missing? Just TV and Smartwatch, I believe that the support will arrive shortly!
Can you show me the code? #
I don’t want to go in detail in DialogFlow configuration, there are really many good tutorials that explain the setup and how to use it. I assume that you have Flutter installed. If you haven’t, you can start from this guide. After installing Flutter, since its conception is Mobile, if you want to compile also for web you must execute the following commands:
//enable web flutter versione
flutter channel master
flutter upgrade
flutter config --enable-web
//new web project and run in chrome
cd into project directory
flutter create .
flutter run -d chrome
Once the web version of flutter has been enabled and the project has been created, we can proceed by update the pubspec.yaml file. This file contains the configurations and dependencies to the plugins that we use in our project. We must therefore add the dependencies to DialogFlow, the compatible version for both web and mobile is as follows:
   flutter_dialogflow: ^0.1.3
 assets:
   - assets/yourapifile.json
We must also add in the assets the json file downloaded from google cloud relating to the service account that has access to the DialogFlow project. The implementation of dialog Flow requires very little, just a few lines of initialization code:
     dialogFlow.AuthGoogle authGoogle = await dialogFlow.AuthGoogle(fileJson:"assets/yourapifile.json").build();
     dialogflow = dialogFlow.Dialogflow(authGoogle: authGoogle);
Finally we have to ask DialogFlow to process the intent in order to receive a response, do this with the following line of code:
    dialogFlow.AIResponse response = await dialogflow.detectIntent(query);
    print(response.getMessage());
The whole working implementation can be found at the following link Github. In order to use it, you only need to add your service account Json key, which you will have to create on Google Cloud and associate it with DialogFlow.
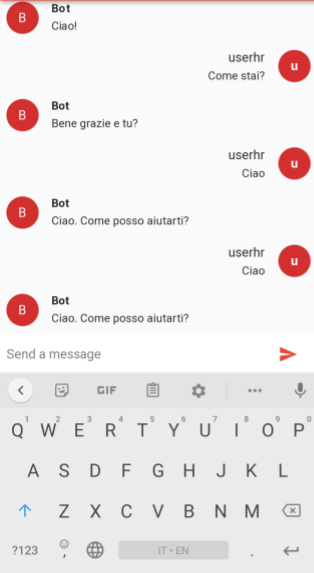
final result screen:


